Like a diligent student, I read up on personal accounts of their digital perm experience and researched on rates offered by different salons. What made me hesitate is the maintenance of the curls and the possibility of damage to the hair. But at that point, keri pa din ako and I still wanted to push through.
 Call it fate when I came across a video of beauty blogger Judy of ItsJudyTime on how she does heatless curls. Her tool of choice? Foam rollers! You can check out her video here.
My first problem was I had no idea where to get foam rollers (hehe) and second, I wasn't sure if it will work on my straight hair.
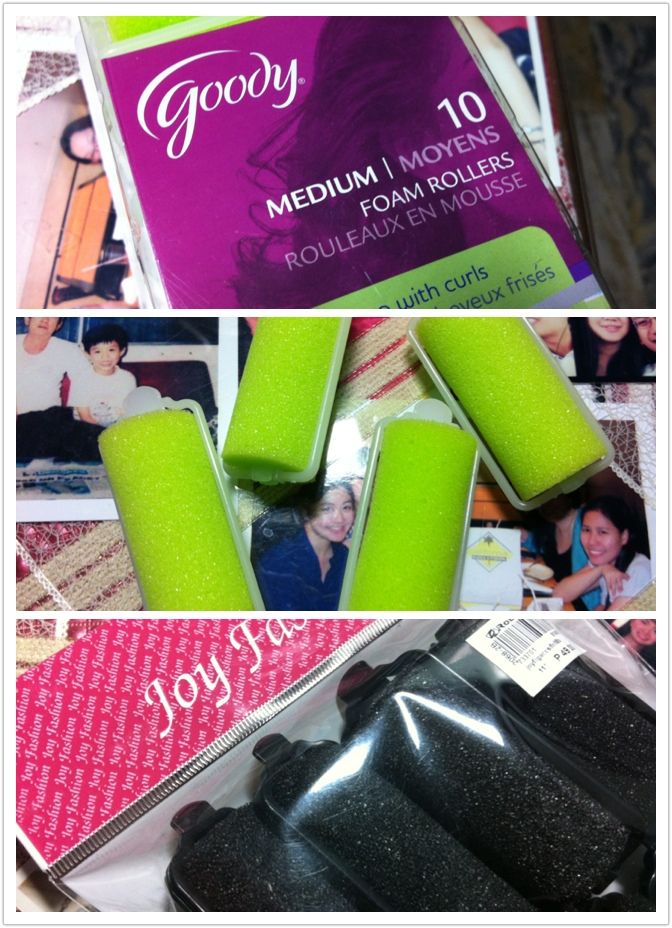
I chanced upon Goody foam rollers in a supermarket last Saturday and was excited to see its affordable price but I walked away. WHAT, YOU WALKED AWAY?! Yup, I didn't put it in the cart BUT I researched (again like a diligent student) on foam rollers and looked up bloggers' accounts on it. I was sold after seeing several entries. I checked out the mall department store the next day and found neon Goody foam rollers. Funky. :D And here starts my curly-for-a-day experience... :)
THE TOOL
 |
| Anatomy of a foam roller, lol. |
See the "ear" (the
protruding part) of the roller? That's the key to opening the roller.
Would you believe that I couldn't even open the roller the first time,
hahaha, I was afraid to put force and break the whole thing. I
discovered that I just need to press with my thumb and with a little
pressure to open.
The plastic does not seem very sturdy to me so I would advise the use of minimum pressure on it, hehehe. It's very easy to open naman. :)
The
foam is inserted into a plastic rod which is clipped to the rectangular
base. Be careful as the foam can slide out of the rod. It is super soft
and dense (unlike the foam of Joy Fashion rollers which is also soft
but less denser). As to the effect of density to the curls, I really
don't know. :P
How well did the foam rollers do its job? Read after the jump!
LET'S GET CURLING!
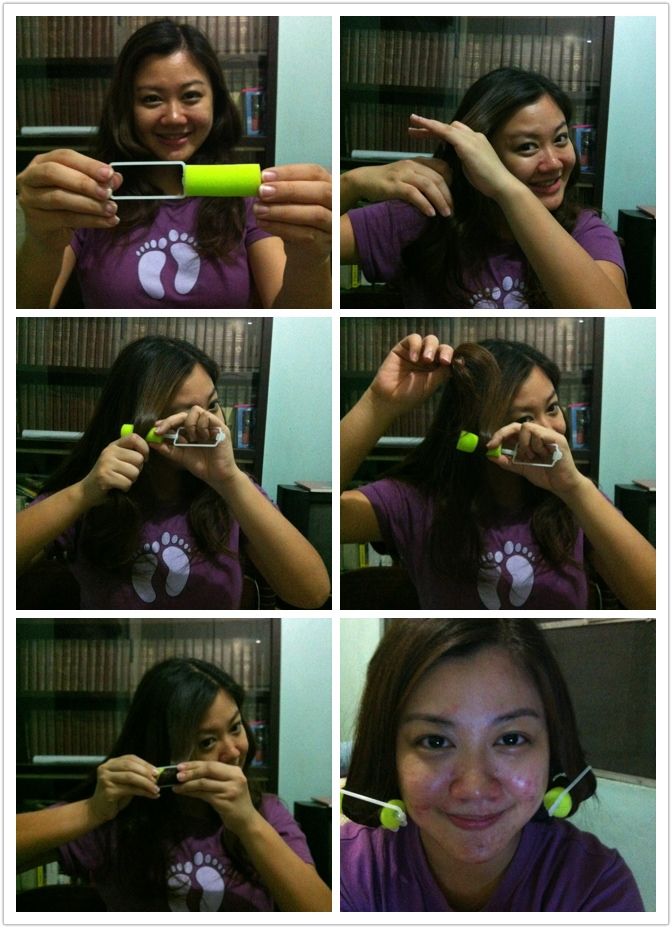 *Note: I took the photos after taking off my rollers and seeing the magic of the foam thingies hence the already curly hair in the photos.
Because I'm structured (haha), I sectioned my hair into four parts: top left, top right, bottom left, bottom right. Each part would be further divided into 2-3 parts since I have thick hair.
First, I put on some mousse on my hair (White Rain). I took a half of a section and combed it first before rolling in a roller just so that the hair does not get tangled later.
I then placed the roller in the middle of the half-section (instead of at the end) and rolled the bottom half of the half-section into the roller. Afterwards, I roll upwards until it reaches just by or below the ear since I want the curls to start just by my chin (anything above might emphasize my chubby cheeks, teehee). I used up around 8-10 rollers in total.
*Excuse my red face as I took it with a bare face and after putting on medicated cream. :D
MORNING AFTER...
I slept with the rollers on my hair the whole night just to make sure that I gave it 'enough' time. Some put it on for only about an hour to three but I wanted to make sure since I have super straight hair. The next morning, I opened the rollers, unwound the hair, bent over and shook the curls loose. Voila, curly-haired Miss JenAusten for a day!
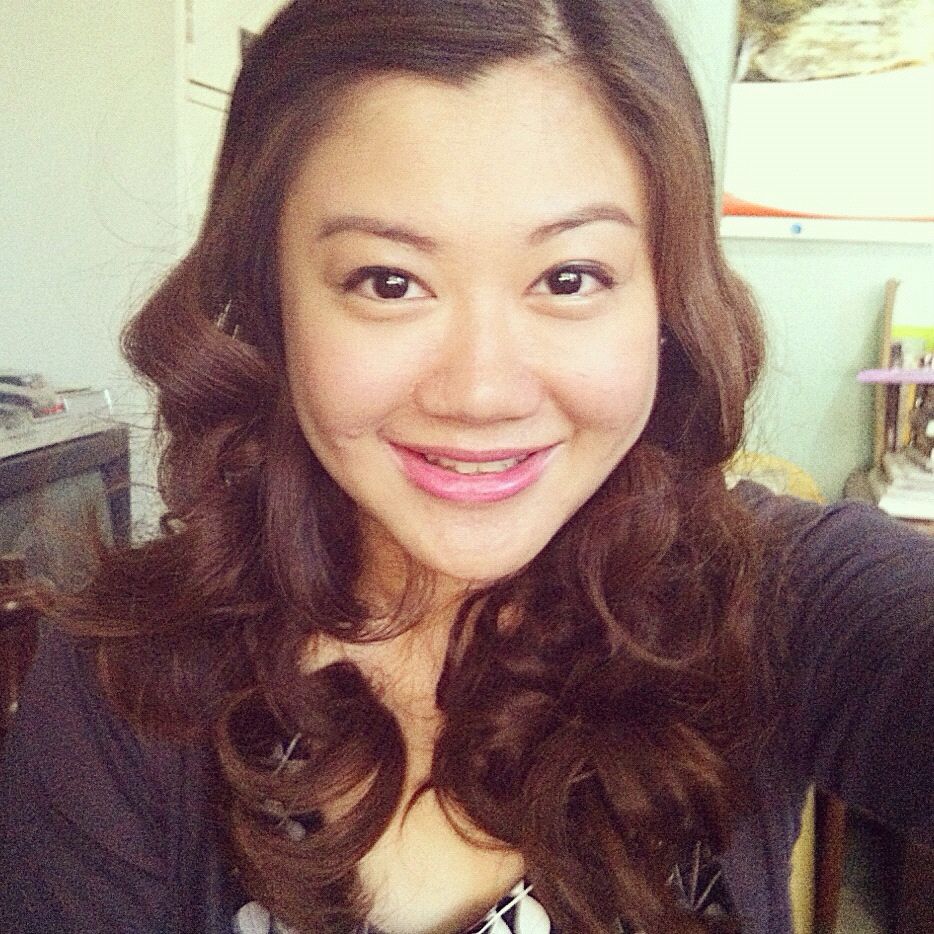 |
| Curls in the morning! |
 |
| Curls at the of the day |
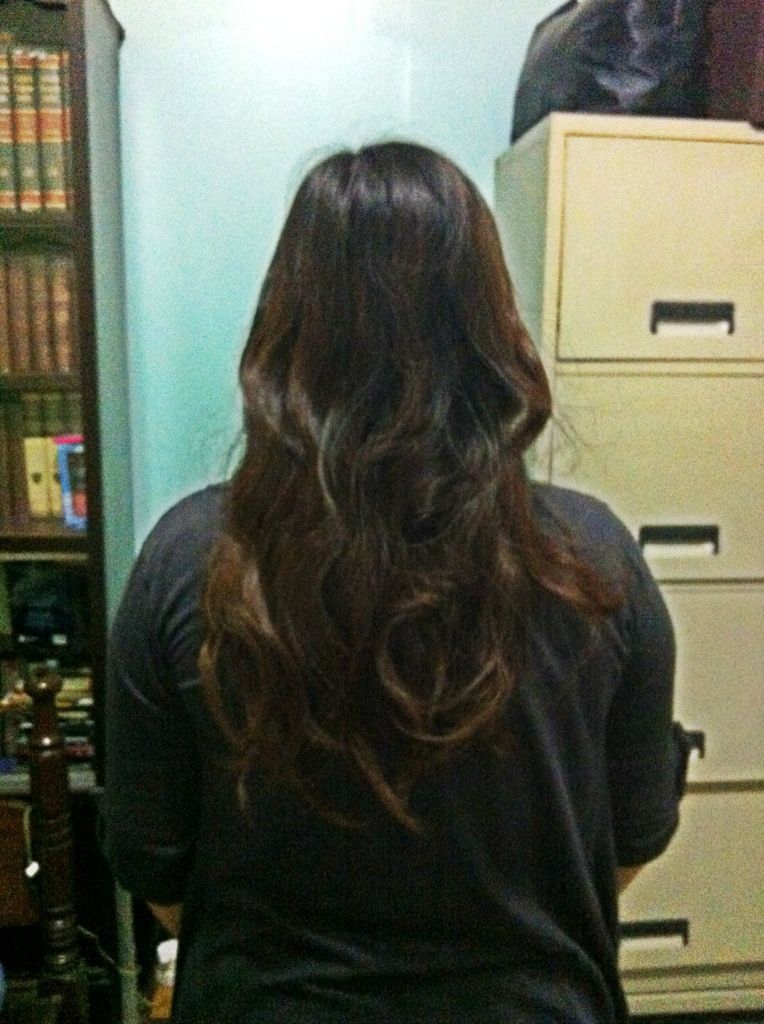 |
| Back view: end of the day curls |
 |
| Brushed out curls |
 |
| Emotera lang :) |
There goes my curly-for-a-day experience! I'm pleased with the results, the foam rollers really worked! :) But I realized that maintaining curly hair might be a bit hard especially that I've been used to straight hair (tying it up most of the time) and that I commute as well everyday. I'm foregoing my previous decision to get a perm and will stick with foam rollers for now, heehee. I might try the large-sized rollers next. Hope to get to blog about that. :)


0 comments:
Post a Comment